
As a mechanical engineer, it's inevitable to encounter defects and unintended outcomes.
When such situations arise, many people rely on intuition or past experiences to address them.
However, this approach often fails to identify the true cause, leading to insufficient solutions.
To clearly identify the actual cause, it's essential to "write it down."
In this article, we will explain the appropriate approach when faced with defects or unintended results.
- Key points of this article
- No need for complicated methods, Excel is sufficient.
- Categorize phenomena using processes, parts, and paths, then list out the causes.
- Prioritize solutions based on the most likely causes.
Method of Estimating Causes
Identifying the cause of defects or unintended outcomes is crucial.
There are many methods developed worldwide for this purpose, like the "Fishbone Diagram."
However, most of these methods are often too cumbersome to use in practical situations.
As a result, people might end up just brainstorming or only considering solutions for spontaneously raised issues.
Hence, what we recommend here is a simple method: using Excel to "write down" the potential causes.
Method of estimating causes using Excel
- Choose one of the following according to type:
- Manufacturing process
- Part
- Route
- List out potential causes for each.
- Record any current confirmations for the listed items.
- Based on this, decide if it could potentially be a cause.
- List out items that require additional verification.
- Prioritize each item and proceed with actual tasks.
Example
To clarify, let's consider an example.
For analysis based on the process
Assuming that a dimension defect is found in the finished product.
1.Choose a type
In this case, there's a high possibility that the defect occurred somewhere from the start to the completion of the manufacturing process.
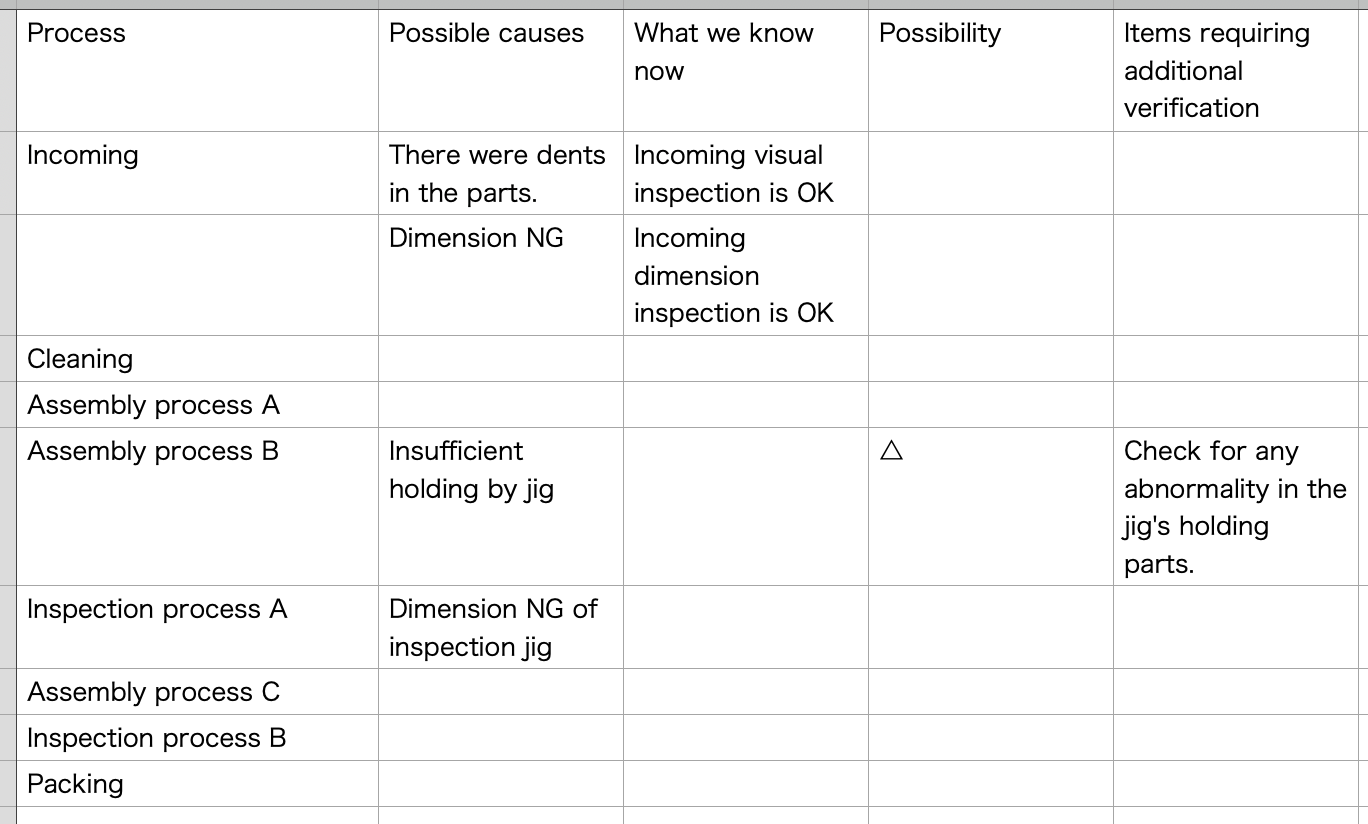
List out all processes, from part acceptance to packaging, as shown in the table below.
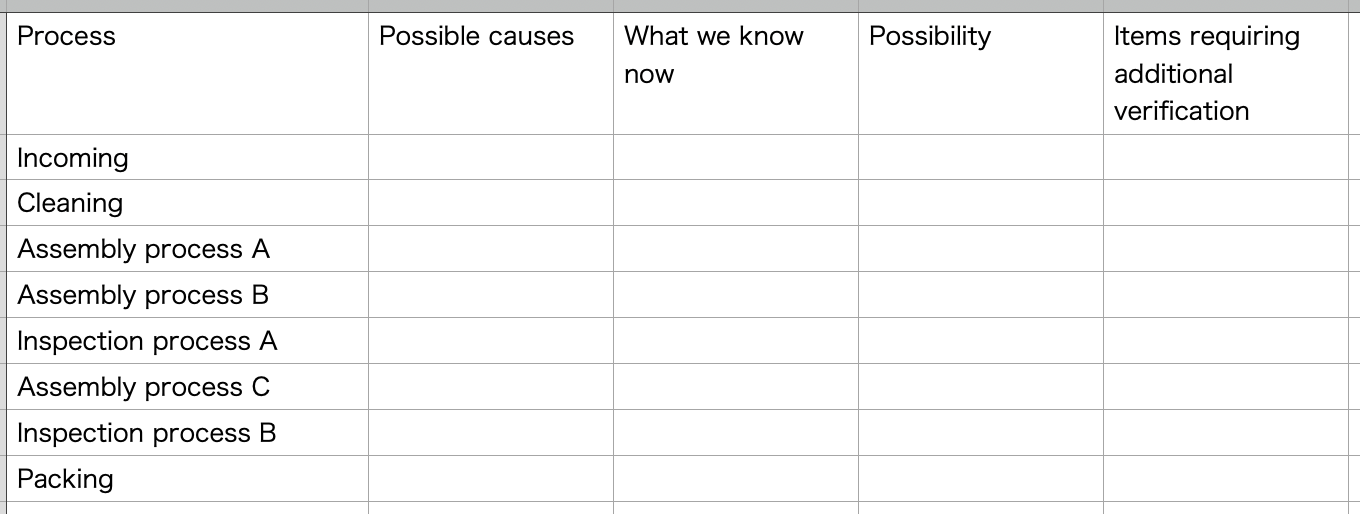
2.List potential causes for each
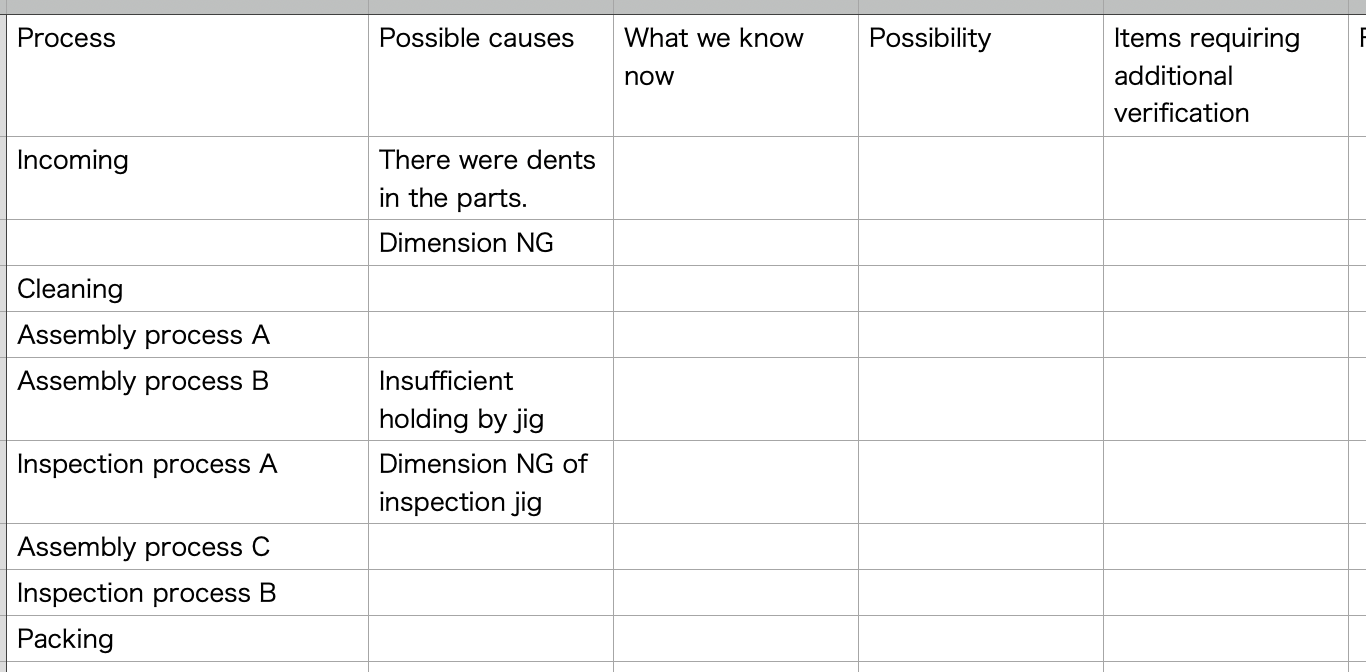
For the part acceptance process, potential causes might include "There was a dent on the part" or "The part's dimensions were NG."
List everything that comes to mind.
3.Record any current confirmations for the listed items
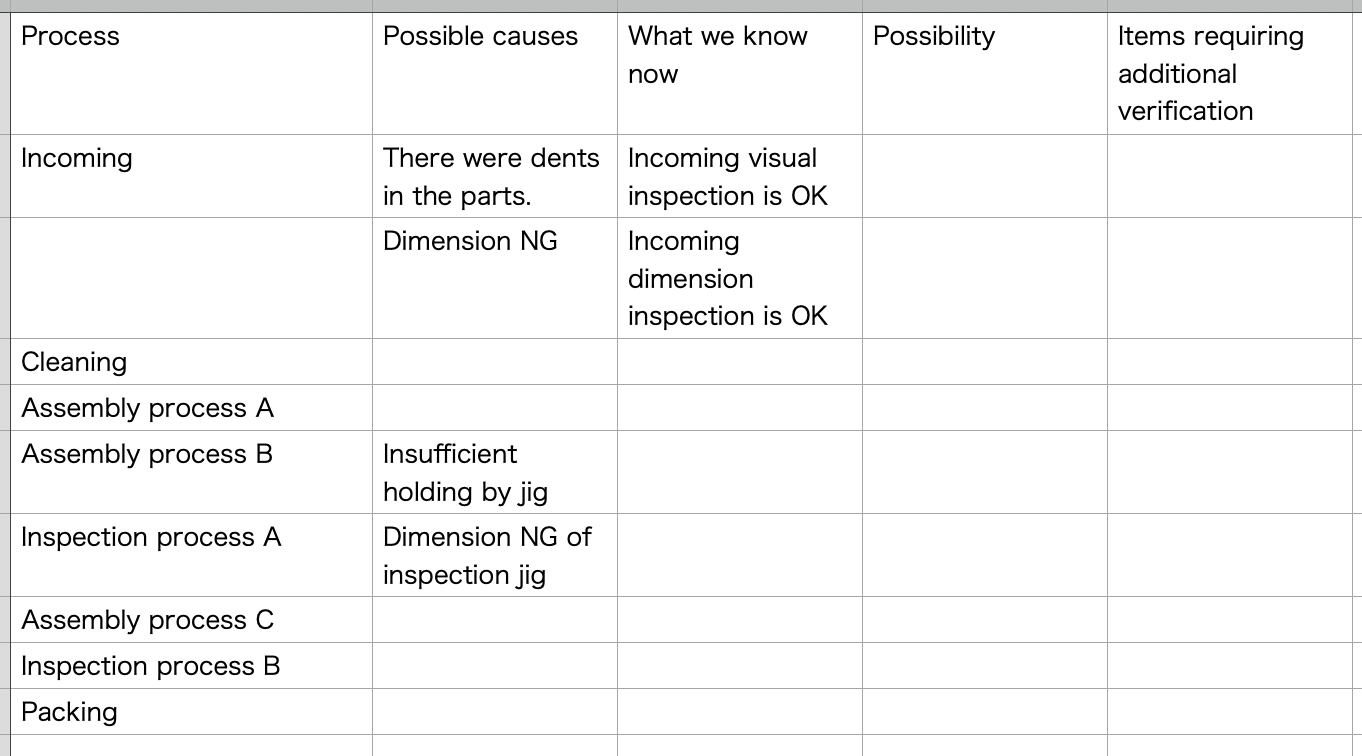
For "There was a dent on the part," you'd check what the actual situation was.
If there was no abnormality found during the visual inspection at acceptance, you'd write "Incoming inspection was OK."
4.Based on this, decide if it could potentially be a cause
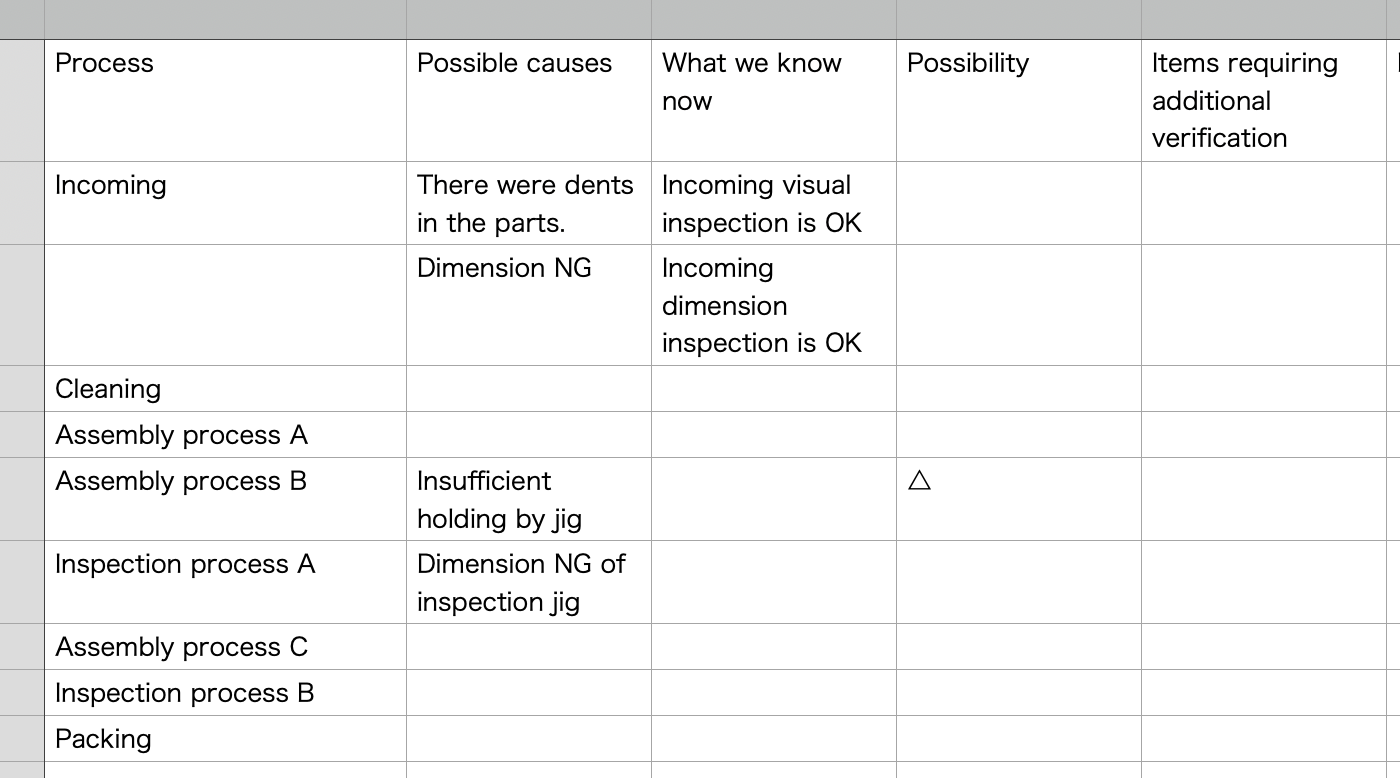
If there's no confirmation, the item can't be ruled out as a potential cause.
You might mark it with a symbol like △.
5.List out items that require additional verification
For the tooling issue mentioned earlier, checking if there's an issue with the pressed part would suffice.
Thus, you'd list "Check the part" as an item that requires further verification.
6.Prioritize each item and proceed with actual tasks
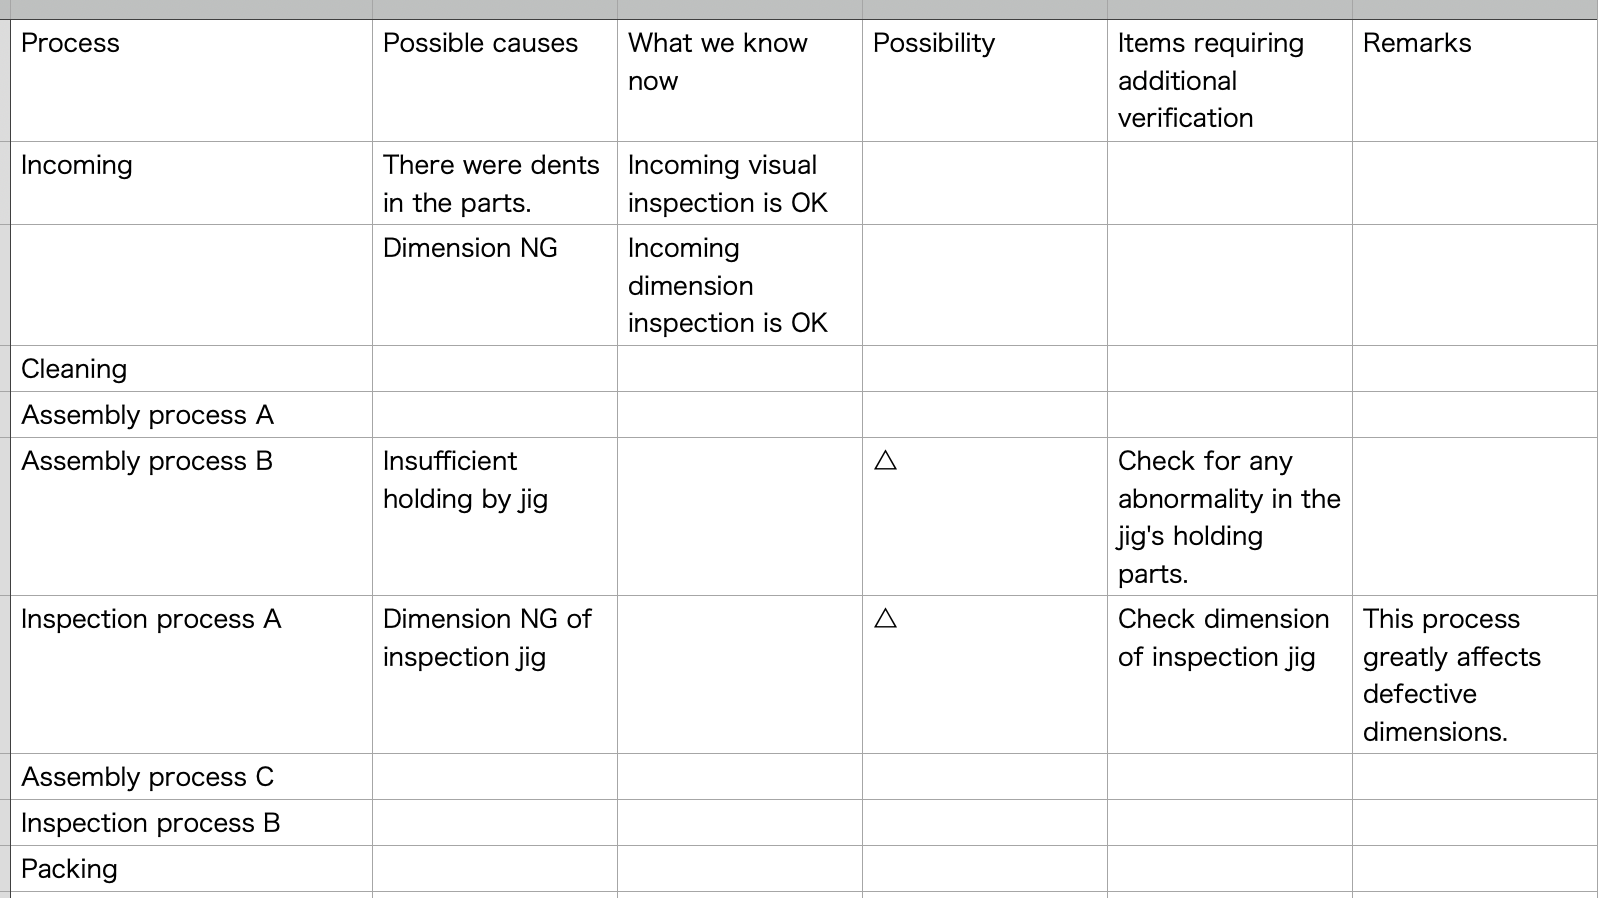
Checking every item might be time-consuming or challenging due to resource constraints.
Therefore, prioritize.
If, for instance, there was a dimension anomaly in the inspection tool during Inspection Process A that could majorly influence the defect observed, that verification would have the highest priority.
For analysis based on the route
Consider a scenario where the pressure loss was higher than initially anticipated for a specific flow route.
In this case, break down the route and list potential causes.

Following the method above, you'd end up with a table of possible causes.
For instance, if it seems there's an issue with the flow assumptions, actions like verifying the Reynolds number or rechecking the flow using analysis software might be suggested.
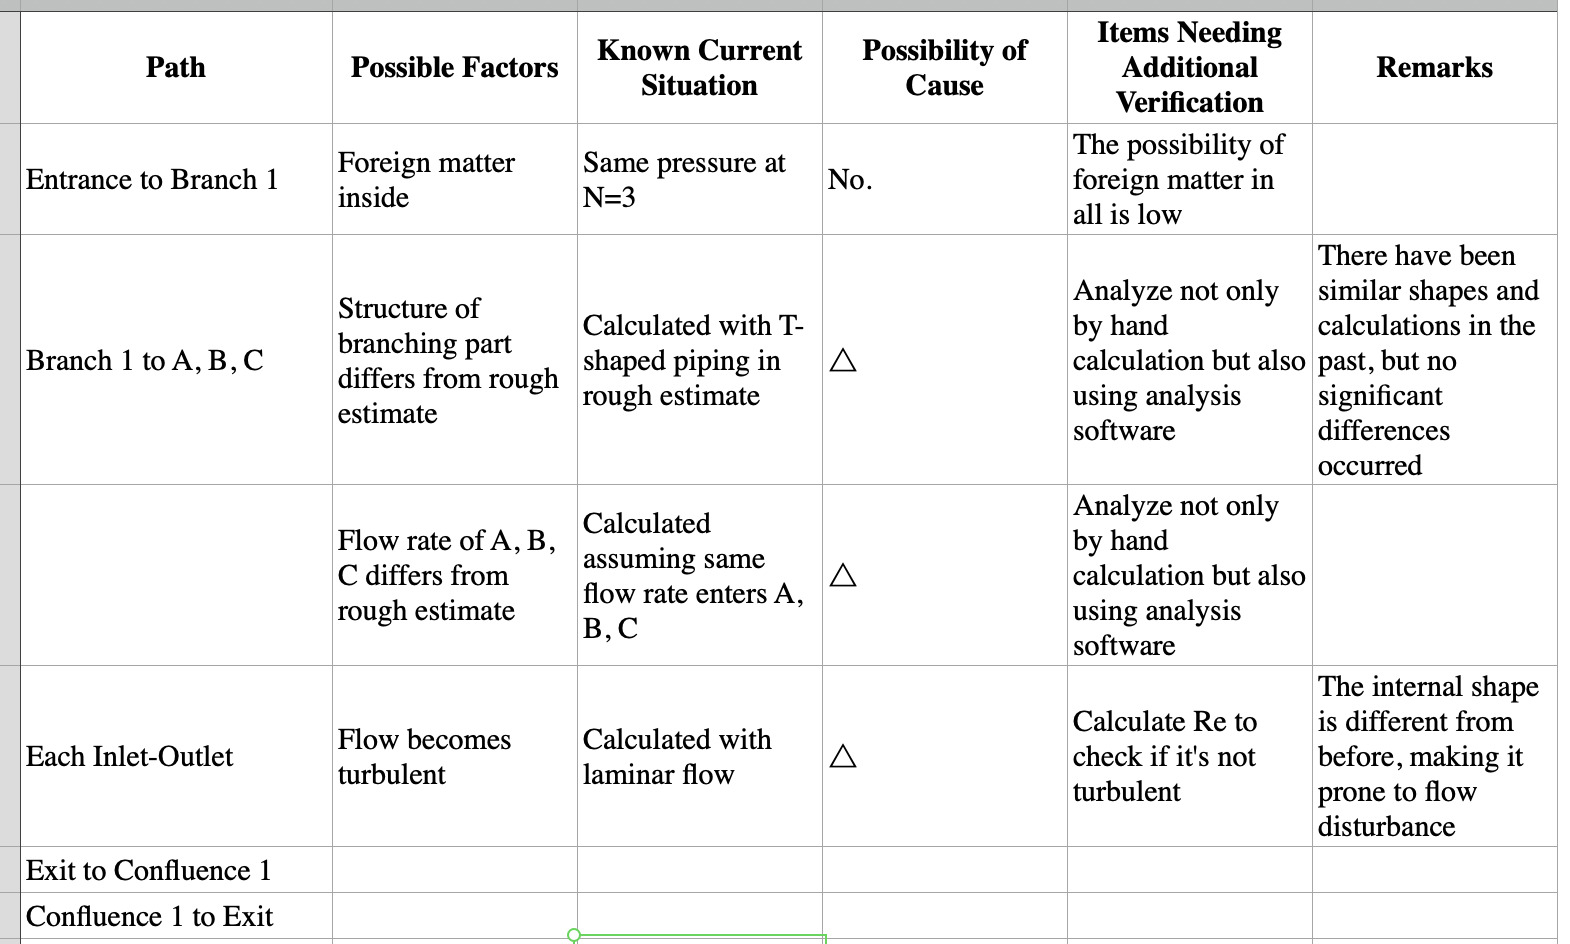
Putting everything into a table provides clarity and promotes constructive discussion.
Conclusion
When facing defects or unintended outcomes, accurately identifying the cause is of utmost importance.
If you proceed with measures without thoroughly understanding the root cause, you'll likely end up revisiting issues repeatedly.
As a first step to address this, try the method of "writing it down."